| sections in this module | City
College of San Francisco - CS260A Unix/Linux System Administration Module: Virtual Machines |
module list |
Virtualization, even when limited to the KVM virtualization system, as we will do in this class, is a big topic. We begin by covering the basics of using and cloning VMs assuming:
Later we will cover the installation of virtualization software
and of the virtual machines (VMs) themselves. Although we will
begin discussing one commandline utility for controlling VMs in
this section, we will only scratch the surface of that work.
In our discussion of VMs, the VM refers to the virtual machine itself. The host refers to the physical machine that hosts the VM (that the VM is running on). Hence, the virtual machine manager (virt-manager) runs on the host.
Whenever
VMs are running they use a significant slice of the host's memory. We
will discuss soon how to set a VM to ensure that it is suspended and
restarted with the host, but you must limit such use to a few VMs per
student. Any other temporary VMs must be shutdown when you are finished.
Virtualization files
On the host, a VM consists of two parts
When the VM is started, the XML file is used to create the virtual hardware and the image file is used to boot the system.
The XML files reside beneath /etc/libvirt/qemu. Feel free to examine them
[XML files are, of course, text, but they are only readable by root] and see what they
include. The files are quite small (a few pages at most).
The image files reside in /var/lib/libvirt/images.
You can list this directory (as root), but the files are binary so they
cannot be examined. These files are huge, since they are disk
images. A normal size for a linux VM is 6-20GB. VMs of other operating systems are much larger. Because of this,
storage for image files must be allocated elsewhere, as, on a
well-configured host, the /var
partition is rather small. The simplest solution here is to
replace /var/lib/libvirt/images
with a symlink to a separate [large] partition. This should be done
before VMs are created. It also requires some SELinux labeling, which
we will discuss in the advanced topics, time-permitting. SELinux is
discussed in more detail in the cs260p course.
Using the GUI
The simplest way to control and access VMs is using the virtual
machine manager virt-manager.
The easiest way to launch it is from a root shell (although on RH6 it appears in the Applications->System
Tools menu). (Note: the first time virt-manager is started it may take a few minutes to connect. Be patient.)
# virt-manager
Using virt-manager you can start a VM by selecting it and clicking the button that looks like 'play' (do not start any VMs with the word master in their name. They are only for cloning!). Once it is running you can control it by
The virtual machine manager, of course, has its own configuration. These can be viewed in virt-manager's Edit->Connection Details menu. Of special importance here are the virtual networks. These are the network(s) the VMs "see".
Getting a VM
To get a VM you have a few choices:
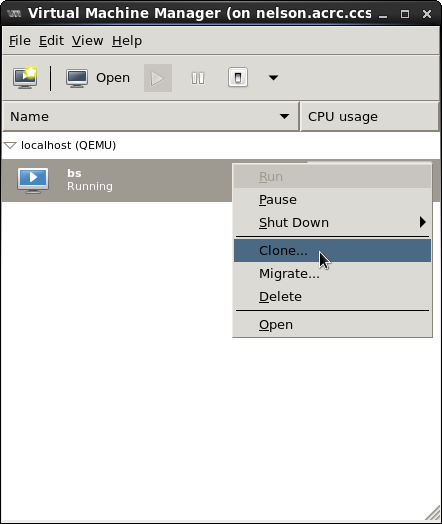
Cloning a VM
Cloning a VM is
very easy. Simply make sure the master VM is shut down, then
right-click on it in virt-manager and choose Clone.
Rename your VM. The default settings should be fine. (Remember, any RAM
you take for the VM comes from
the host. Our hosts currently have about 12GiB. If each VM takes about
1GiB average, this maxes out at about 8 VMs running per host, and there are up to three classes that use VMs! )
Once your VM is cloned, start it and login. It has the same root password as the original and the same student login.
Fixing RH6 clones
Note: this is not an issue with RH7 VMs - the network interface is correct.
If you clone a RH6 VM, there is one issue you should resolve. Although the cloned VM should work fine, unfortunately, the network interface information is not always consistent and may require fixing. This is because the configuration files are not always updated to match the new interface and may need editing. Let's take a look at the output of a newly-cloned RH 6.5 VM's ifconfig information and a listing of the files in /etc/sysconfig/network-scripts that should match.
$ cd
/etc/sysconfig/network-scripts
$ ls ifcfg*
ifcfg-eth0 ifcfg-lo
$ ifconfig
eth1 Link encap:Ethernet
HWaddr 00:16:3E:C4:31:BF
inet
addr:192.168.122.207 Bcast:192.168.122.255
Mask:255.255.255.0
inet6 addr:
fe80::216:3eff:fec4:31bf/64 Scope:Link
UP
BROADCAST RUNNING MULTICAST MTU:1500 Metric:1
RX
packets:160 errors:0 dropped:0 overruns:0 frame:0
TX
packets:41 errors:0 dropped:0 overruns:0 carrier:0
collisions:0 txqueuelen:1000
RX
bytes:18066 (17.6 KiB) TX bytes:5842 (5.7 KiB)
lo Link encap:Local
Loopback
inet
addr:127.0.0.1 Mask:255.0.0.0
inet6 addr:
::1/128 Scope:Host
UP LOOPBACK
RUNNING MTU:16436 Metric:1
RX
packets:8 errors:0 dropped:0 overruns:0 frame:0
TX
packets:8 errors:0 dropped:0 overruns:0 carrier:0
collisions:0 txqueuelen:0
RX
bytes:480 (480.0 b) TX bytes:480 (480.0 b)
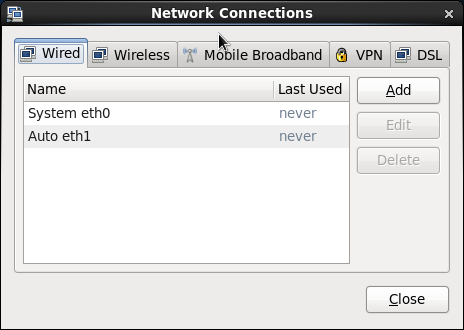
As you see, the files in the network-scripts directory do not match the output of ifconfig. (The configuration files indicate the interface is eth0, while the output of ifconfig indicates eth1.) Further, both interfaces will show up in the Network Connections control panel:
After these changes the network can be restarted using the service network restart command.
Shutting down a VM
The best way to shut down a VM is on the VM itself. To do this,
either login the the VM, become root, and execute the poweroff command
or use the menu option at the GUI (under the power button icon in the
right-most menu for RH7 VMs when logged on, or under the power button
in the upper-right of the GUI when you are not logged on.)
You can supposedly shut down a VM from virt-manager as well, but, if
your VM is running a GUI, this doesn't work consistently. Assuming your
VM is not busy, it is pretty safe to Force off
your VM instead. This is essentially the same as pulling the power cord
(hence the reference above to 'the best way'!) Note: never Force a VM
off when it is updating!
Deleting a VM
From time to time you will need to delete a VM. This is easy using virt-manager, just shutdown the VM (in this case, just Force off, since you are deleting it anyway), then select the delete option in virt-manager's context menu. Make sure the box to remove the storage file is checked.
Fairly often, the storage for the VM will not remove correctly and
you will get an error about this. The best solution is to simply remove
the image file by hand as root using the path shown in the error
message. You should always ensure that the image file is removed. They
are big files (15GiB) and can quickly fill up the filesystem.
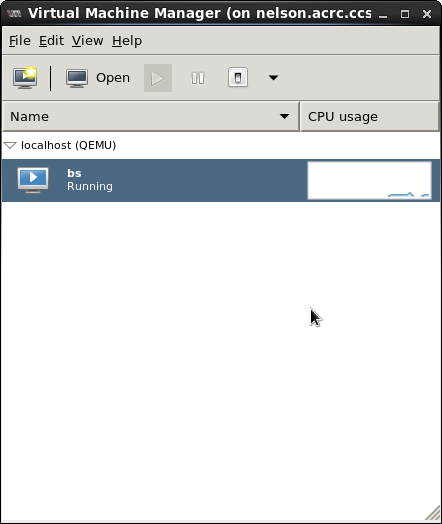
The bs server
Each linux host should have a single VM pre-installed named bs. (This stands for "basic server", but I'm sure the name is easy to remember.) It should always be running. bs provides lots of services for the classes on that host that use VMs. In particular at this introductory stage it provides the installation source and kickstart files for installing virtual machines. This means the installation of a VM occurs without adding network traffic - very nice when everyone is installing VMs at once!
You will be provided with the unprivileged account password on the
basic server VM. Remember, it is used by all classes that use VMs. Even
though each class has its own virtual network, bs serves all of them.
(It is multi-homed.) Make sure you don't shut it down.
A few extra hints
There are a few strange issues that get students stuck when they first use VMs. Hopefully this section will help you avoid the worst pitfalls:
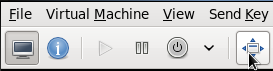
Once you are zoomed to fullscreen, there is no obvious way to get out of it. Move your cursor to the top middle of the screen (there is a slight white line there) and a small menu will pop up with the 'return to a window' icon:

| Prev | This page was made entirely
with free software on linux: the Mozilla Project, Kompozer, and LibreOffice |
Next |